Earlier this week I read this post over on The Lead Adventure Forum. It got me thinking.....
I had picked up this battery operated fly swatter from a £1.00 store in Cheltenham some time ago with the intention of building myself a 'metal tea-strainer' style static grass applicator, one of those projects that I would eventually get around too! But this post had prompted me to build myself my own applicator.
Image One - The bare necessities. The Bug Zapper (£1.00), some spare Wire (free), a Metal Biscuit Tin Lid (actually my daughters, so again free) and a couple of Crocodile Clips (found in my tool box). The only other thing/things I used were two cable connectors (spares from my tool box) and a Bamboo Skewer which I added to the second crocodile clip to act as a handle.
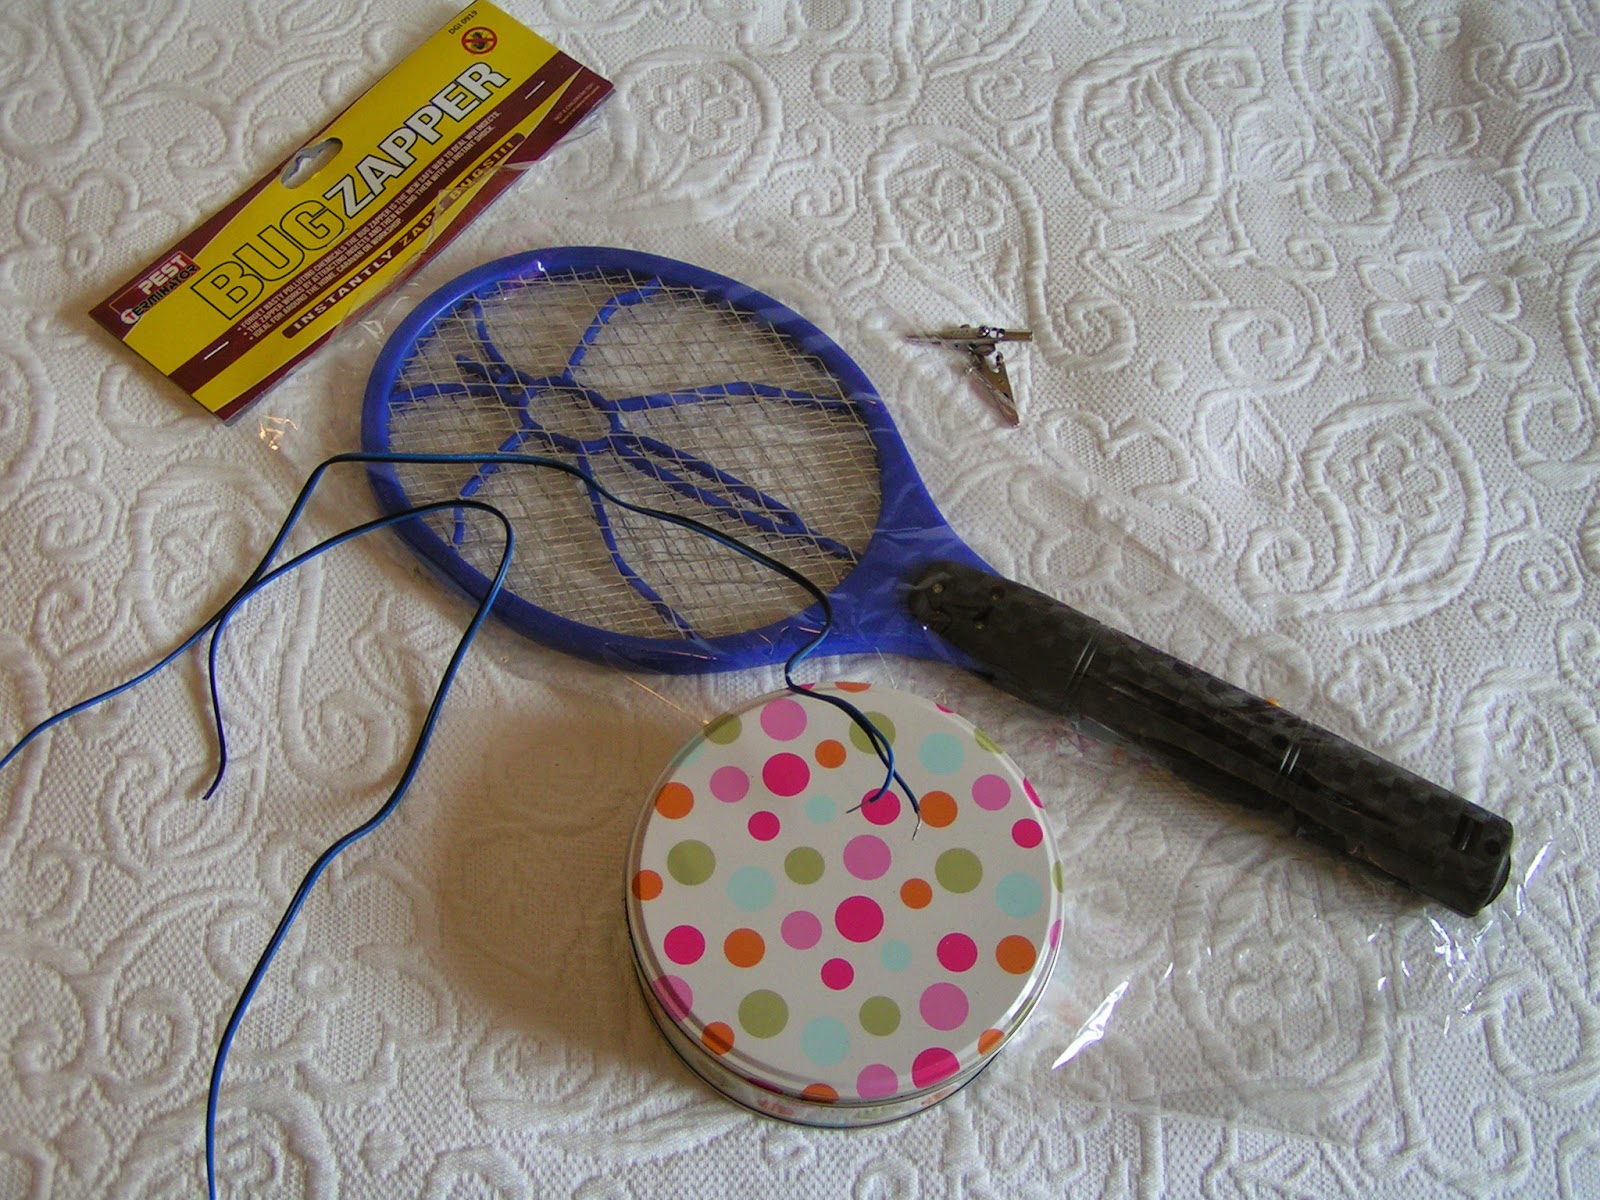
Image Two - I dismantled the Zapper and found that there were three wires (two Black connected to one terminal and one Red). I joined the two Black wires together and then connected them to the spare black wire and the first crocodile clip.
The Red wire was connected to the spare blue wire and the second crocodile clip.
I have discarded the blue bat head and metal grills.
Dismantling and re-connecting the handle was a little tricky, but after three goes it all went back together and was now ready for testing.
I installed the two 1.5volt AA batteries, clipped one crocodile clip to the metal lid and added a sprinkling of static grass. The second crocodile clip was attached to a 1 Cent, Euro coin onto which I had painted some Unibond uPVA White Glue.
And SWITCHED ON!

Image Three - To my amazement, it all worked, actually worked perfectly! With the individual strands of static grass being both lifted and aligned onto the uPVA Glue.
To operate, I held the metal coin over the static grass strands (glue side down) and pressed the button on the Zapper handle. I does take more than one pass to get a good covering of grass.
My Wife who was very sceptical and even now continued to make comments about wearing rubber soled shoes, was also surprised at how this worked and watched with interest as the tiny static grass strands jumped onto the coin.

I have no idea as to the science involved, but IT WORKS and I am now looking forward to applying static grass to my Todoroni - that is once I finish painting and varnishing them.
Be warned, there is quite a hefty static charge when the crocodile clip connects with the metal lid, lots of sparks and quite a noise, but this was expected after reading other static grass applicator posts. This was the main reason I added a bamboo skewer to the second crocodile clip.
I hope that this post has proven to be of interest.
Tony


4 comments:
I built the tea strainer version a couple of months ago.
It works although it could do with a bit more power!
I may convert it over to this system as I thing it might work a little better for figures...
Very useful, and it certainly improves the look of the static grass.
How will it work with a plastic base though?
As an aside, I had never considered that the metal clips might be called "crocodile" clips, as here they are "alligator". you learn something new every day.
"How will the bases work with a plastic base?"
I'll report back at a later date.
Tony
I seem to remember a video on Beasts of War when they were adding static grass to a Dropzone Commander paper mat. They slid a small metal plate under the map, I guess that replaces running current through the coin
Post a Comment